はじめに
現在Next.jsでアプリを作っていて、先日実装した画像アップロード機能が思いのほか苦戦したので、備忘録を残そうかと思います。
使用技術
- Next.js(RouteHandlerを使用)
- Cloudflare R2
今回ストレージはS3ではなくCloudflareR2を選択しました。 HP概要にもあるとおり、無料プラン枠も広かったですし、 一度S3も試してみましたが画像取得速度はR2の方が早かったため、R2を採用しました。 cloudflareのCDNが勝手に機能してくれるそうで、無料なのにいいな、と思いました。 無料プラン枠としては以下のとおりです。(2024年5月時点)
- ストレージ 10GB/月
- 状態の変更 100万/月
- 読み取り 1000万/月
S3もCDNとしてCloudFrontの設定をしていれば表示も早くなったと思いますが、料金的にもそこまでかけたくなかったのでそのままR2にした感じです。
実装手順
それぞれ順を追って記載します。
CloudflareR2の設定
まず、CloudflareR2を設定し、バケットを作成する必要があるので、アカウント作成、バケット作成を行いました。 こちらは以下サイトを参考にしましたので、ご参照ください。
バケットを作成し、以下情報を取得し、.envファイルに記載します。
(秘匿情報なので.gitignoreファイルには必ず.envを追加しgit管理から除外してください)
REGION='auto'
BUCKET_NAME='test'
CLOUDFLARE_ACCESS_KEY_ID=xxxxxxxxx
CLOUDFLARE_ACCESS_KEY=xxxxxxxxx
CLOUDFLARE_ENDPOINT=xxxxxxxxx

IMAGE_HOST_URL=有効にしたサブドメインを記載
APIエンドポイントの作成
Next.jsのRouteHandlerを活用し、APIエンドポイントを作成しました。 まずは、オブジェクト操作に必要なSDKをインストールします。
npm i @aws-sdk/client-s3必要なエンドポイントを以下のように作成しています。 今回は名前とプロフィール画像を登録する実装に使用しているのでそれっぽいネーミングになっています。
import { S3Client, PutObjectCommand } from '@aws-sdk/client-s3'
import { NextResponse, NextRequest } from 'next/server'

import { prisma, main } from '@/lib/prisma'

export async function POST(req: NextRequest) {
  const formData = await req.formData()
  const id = formData.get('id') as string
  const name = formData.get('name') as string
  const image = formData.get('image') as File

  const {
    CLOUDFLARE_ACCESS_KEY_ID,
    CLOUDFLARE_ENDPOINT,
    CLOUDFLARE_ACCESS_KEY,
    REGION,
    BUCKET_NAME,
  } = process.env

  try {
    await main()

    const s3Client = new S3Client({
      region: REGION,
      endpoint: CLOUDFLARE_ENDPOINT as string,
      credentials: {
        accessKeyId: CLOUDFLARE_ACCESS_KEY_ID || '',
        secretAccessKey: CLOUDFLARE_ACCESS_KEY || '',
      },
    })

    const fileName = `${Date.now()}-${id}-${name}`
    const buffer = Buffer.from(await image.arrayBuffer())

    const uploadImage: any = {
      Bucket: BUCKET_NAME,
      Key: fileName,
      Body: buffer,
      ContentType: image.type,
      ACL: 'public-read',
    }

    const command = new PutObjectCommand(uploadImage)
    await s3Client.send(command)
    const imageUrl = `${process.env.AVATAR_HOST_URL}/${fileName}`

    const user = await prisma.user.update({
      where: {
        id: id,
      },
      data: {
        name: name,
        image: imageUrl,
      },
    })
    return NextResponse.json({ message: 'Success', user }, { status: 200 })
  } catch (err) {
    console.log(err)
    return NextResponse.json({ message: 'Error', err }, { status: 500 })
  } finally {
    await prisma.$disconnect()
  }
}ClientからはImage情報をFormDataに格納して送信するため、const formData = await req.formData()として受け取り、
id、name、imageと格納されている情報を抽出。(もっといい書き方あるかも。)
const s3Client = new S3Client({
      region: REGION,
      endpoint: CLOUDFLARE_ENDPOINT as string,
      credentials: {
        accessKeyId: CLOUDFLARE_ACCESS_KEY_ID || '',
        secretAccessKey: CLOUDFLARE_ACCESS_KEY || '',
      },
    })
S3Clientに必要な情報をセットしてインスタンス化しており、バケット操作ができる準備を整えます。
    const fileName = `${Date.now()}-${id}-${name}`
    const buffer = Buffer.from(await image.arrayBuffer())

    const uploadImage: any = {
      Bucket: BUCKET_NAME,
      Key: fileName,
      Body: buffer,
      ContentType: image.type,
      ACL: 'public-read',
    }

const command = new PutObjectCommand(uploadImage)uploadImageを定義。S3のライブラリにあるPutObjectCommandを用いてバケットに送信する情報に整形する。
(uploadImageで定義しているJSONのキーは全て大文字から始まるので注意。小文字だとエラーになります(自分がなりました。。。))
await s3Client.send(command)最後にインスタンス化したs3Clientによりバケットに格納情報を送信する処理を行えば、アップロード完了です。
以下のコードはDB保存処理なので、今回は関係ないため説明割愛します。
Client側でFormDataを作成、送信
Client側では以下のような画面を作成しました。
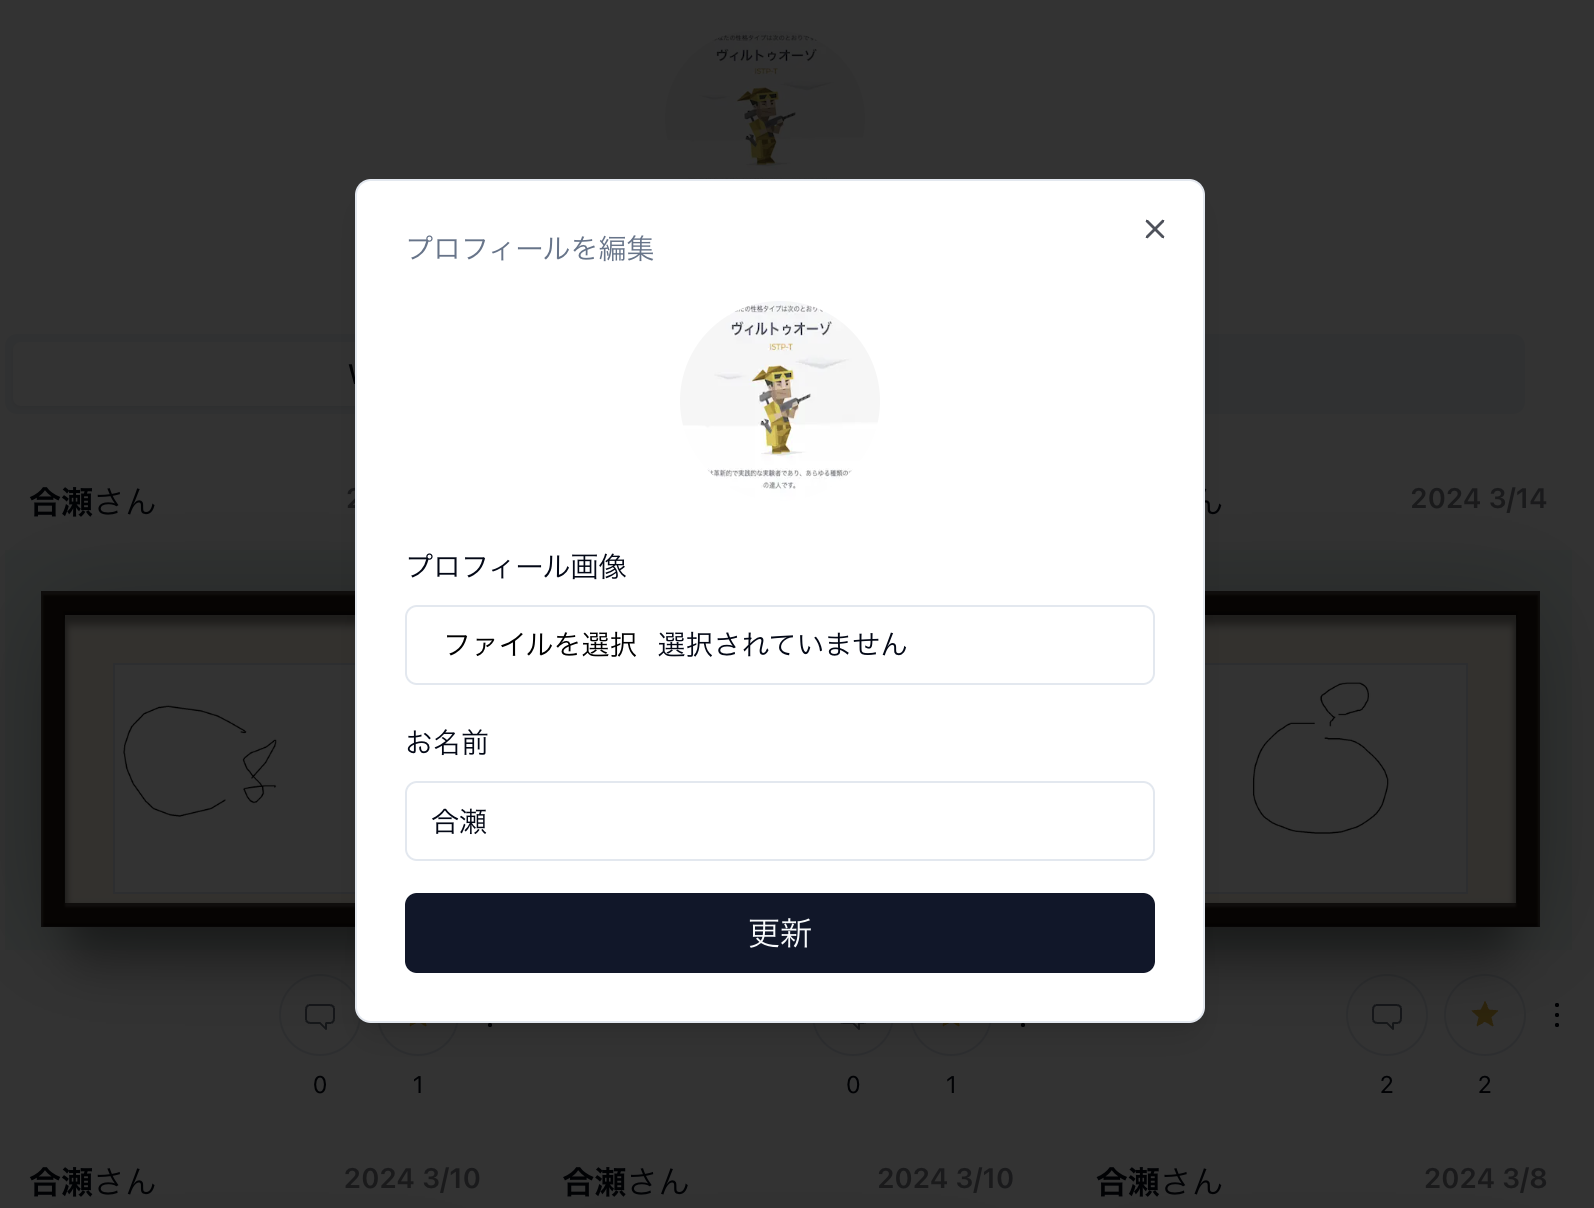 流れは以下の通りです。
- InputタグによってImageファイルを受け取る。
- 受け取ったImageファイルをFormDataのインスタンスに追加する。
- APIエンドポイントに送信する。
実際のコードは複数のファイルに分割しているし、今回の説明には不要な要素もありますが、ご容赦ください。
EditProfileModal.tsx
まずは画面で実装コードは以下のとおり、UIコンポーネントはShadcn/uiでDialogを使用してます。
import { zodResolver } from '@hookform/resolvers/zod'
import Image from 'next/image'
import { ChangeEvent } from 'react'
import { useForm } from 'react-hook-form'
import * as z from 'zod'

import { Button } from '@/components/elements/Button'
import {
  Dialog,
  DialogTrigger,
  DialogContent,
  DialogDescription,
  DialogHeader,
  DialogClose,
} from '@/components/ui/dialog'
import {
  Form,
  FormControl,
  FormField,
  FormItem,
  FormLabel,
  FormMessage,
} from '@/components/ui/form'
import { Input } from '@/components/ui/input'

import { AuthUser } from '@/features/auth/types'

import { useUpdateUser } from '../hooks/useUpdateUser'

import Avatar from './Avatar'

const formSchema = z.object({
  name: z.string().min(1, '必須項目です').max(30, '最大文字数を超過しています'),
  image: z.custom<FileList>().transform((file) => file[0]),
})

type EditProfileModalProps = {
  user: AuthUser
}

const EditProfileModal = ({ user }: EditProfileModalProps) => {
  const { image, previewImage, resetInfo, onUpdate, isLoading } = useUpdateUser(user)
  const form = useForm<z.infer<typeof formSchema>>({
    resolver: zodResolver(formSchema),
    defaultValues: {
      image: undefined,
      name: user.name,
    },
  })

  function onSubmit(values: z.infer<typeof formSchema>) {
    onUpdate(values)
  }

  const avatar = user.image ?? '/avatar.png'

  return (
    <Dialog onOpenChange={resetInfo}>
      <DialogTrigger>
        <Avatar src={avatar} />
      </DialogTrigger>
      <DialogContent className='sm:max-w-[425px]'>
        <DialogHeader>
          <DialogDescription>プロフィールを編集</DialogDescription>
        </DialogHeader>
        <div className='grid w-full max-w-sm items-center'>
          <Form {...form}>
            <form className='space-y-4' onSubmit={form.handleSubmit(onSubmit)}>
              <Image
                alt='avatar'
                className='mx-auto mb-5 size-[100px] rounded-full'
                height={100}
                src={image || avatar}
                width={100}
              />
              <FormField
                control={form.control}
                name='image'
                render={() => (
                  <FormItem>
                    <FormLabel>プロフィール画像</FormLabel>
                    <FormControl>
                      <Input
                        {...form.register('image')}
                        accept='image/*'
                        onChange={(event: ChangeEvent<HTMLInputElement>) => {
                          previewImage(event)
                        }}
                        type='file'
                      />
                    </FormControl>
                    <FormMessage />
                  </FormItem>
                )}
              />
              <FormField
                control={form.control}
                name='name'
                render={({ field }) => (
                  <FormItem>
                    <FormLabel>お名前</FormLabel>
                    <FormControl>
                      <Input {...form.register('name')} {...field} />
                    </FormControl>
                    <FormMessage />
                  </FormItem>
                )}
              />
              <DialogClose asChild>
                <Button
                  className='mt-5 w-full'
                  disabled={isLoading}
                  isLoading={isLoading}
                  type='submit'
                >
                  更新
                </Button>
              </DialogClose>
            </form>
          </Form>
        </div>
      </DialogContent>
    </Dialog>
  )
}

export default EditProfileModal
ごちゃごちゃしているので、重要な部分のみ抜粋。
以下のコードにてzodとreact-hook-formを使用し、入力値(この場合imageとname)のバリデーションとデフォルト値を定義したオブジェクトのインスタンスを生成。
const form = useForm<z.infer<typeof formSchema>>({
  resolver: zodResolver(formSchema),
  defaultValues: {
    image: undefined,
    name: user.name,
  },
})
その上で、以下のFormFieldの中のInput要素でfileを受け取り{...form.register('image')}という実装箇所で先ほどインスタンス化したformにfileを追加しています。
previewImage(event)の箇所はプレビュー画面を表示するために定義したuseStateの関数です。
<FormField
  control={form.control}
  name='image'
  render={() => (
    <FormItem>
      <FormLabel>プロフィール画像</FormLabel>
      <FormControl>
        <Input
          {...form.register('image')}
          accept='image/*'
          onChange={(event: ChangeEvent<HTMLInputElement>) => {
            previewImage(event)
          }}
          type='file'
        />
      </FormControl>
      <FormMessage />
    </FormItem>
  )}
/>formのメソッドであるhandleSubmitでonSubmitに読み込み、その上でformに追加した値をonSubmit経由でonUpdateに渡しています。
onUpdateは別ファイルに記載しているので、後述します。
function onSubmit(values: z.infer<typeof formSchema>) {
  onUpdate(values)
}

... 中略 ....

<form className='space-y-4' onSubmit={form.handleSubmit(onSubmit)}>
userUpdateUser.ts
onUpdateは以下のuseUpdateUserというhooksで定義しています。
import { ChangeEvent, useState } from 'react'
import { toast } from 'sonner'

import { useFetchAuthUserByEmail } from '@/features/auth/hooks/useFetchAuthUserByEmail'
import { AuthUser } from '@/features/auth/types'

import { updateUser } from '../api/updateUser'

export const useUpdateUser = (user: AuthUser) => {
  const [username, setUsername] = useState<string>(user.name)
  const [image, setImage] = useState<string>('')
  const { isLoading, mutate } = useFetchAuthUserByEmail()

  const previewImage = (e: ChangeEvent<HTMLInputElement>) => {
    if (e.target.files) {
      const file = e.target.files[0]
      setImage(window.URL.createObjectURL(file))
    }
  }

  const resetInfo = () => {
    setUsername(user.name)
    setImage('')
  }
  // アップデート処理を実装
  const onUpdate = async (body: { name: string; image: File }) => {
    try {
      const formData = new FormData()

      formData.append('id', user.id)
      formData.append('name', body.name)
      formData.append('image', body.image)

      await updateUser(formData)
      mutate()
      toast('プロフィールを更新しました', { position: 'top-center' })
    } catch (err) {
      console.error(err)
    }
  }

  return {
    image,
    username,
    setUsername,
    previewImage,
    resetInfo,
    onUpdate,
    isLoading,
  }
}
抜粋すると以下の実装であり、FormDataオブジェクトを生成し、それにAPIのRequestBodyに含める要素(id, name, image)をそれぞれ追加します。
その上でupdateUser()という処理の引数に含めることでAPIに通信しています。(これも別ファイルなので後述します)
const onUpdate = async (body: { name: string; image: File }) => {
  try {
    const formData = new FormData()

    formData.append('id', user.id)
    formData.append('name', body.name)
    formData.append('image', body.image)

    await updateUser(formData)
    mutate()
    toast('プロフィールを更新しました', { position: 'top-center' })
  } catch (err) {
    console.error(err)
  }
}
updateUser.ts
最後にupdateUser()の実装内容を以下のとおり記載します。
fetchAPIの共通処理も別で書いていますが、以下コードブロックにまとめておきます。
import { apiClient } from '@/lib/api/api-client'

export const updateUser = async (params: FormData) => {
  return await apiClient.apiPostFormData('/api/profile', params).then((result) => result.json())
}

// 以下、apiClient抜粋(共通処理とはいいつつ、bodyの型を定義するために別途作成してました。)
async apiPostFormData(url: string, body: FormData) {
  const response = await fetch(`${this.baseURL}${url}`, {
    method: 'POST',
    headers: {
      'X-Requested-With': 'XMLHttpRequest',
    },
    body: body,
  })
  return response
}
最後に
無駄な実装もあるかと思いますが、メモとして残しておこうかと思いました。
誰かのお役に立てば嬉しいですが、結構ごちゃごちゃしているので役に立たないかも、、、
一応ソースはこちらなので、もしよければ参照してください。